
Bake The Book: Raisin, Rosemary, and Cinnamon Focaccia

I made this recipe way back in February, so that gives you an idea of how far behind I am in telling you about all the wonderful things I've been baking. However, this is kind of fitting now because we saw a lot of different focaccia in northern Italy. I got plently of inspiration as to how I can tweak this recipe by adding other things like tomatoes, garlic, etc. In fact, in addition to the bear claws that are the next thing I'm making this weekend, I'm going to attempt re-making this focaccia recipe with some different add-in's.
This recipe had raisins in it, which if I'm being honest I'm not a big fan of. However, mixed in with the cinnamon and rosemary flavors in the bread, I could actually handle. The bread was quite tasty and the raisins made it even more moist.
The first step, if you want to plump up your raisins a bit, is to soak them in water you bring up to a boil.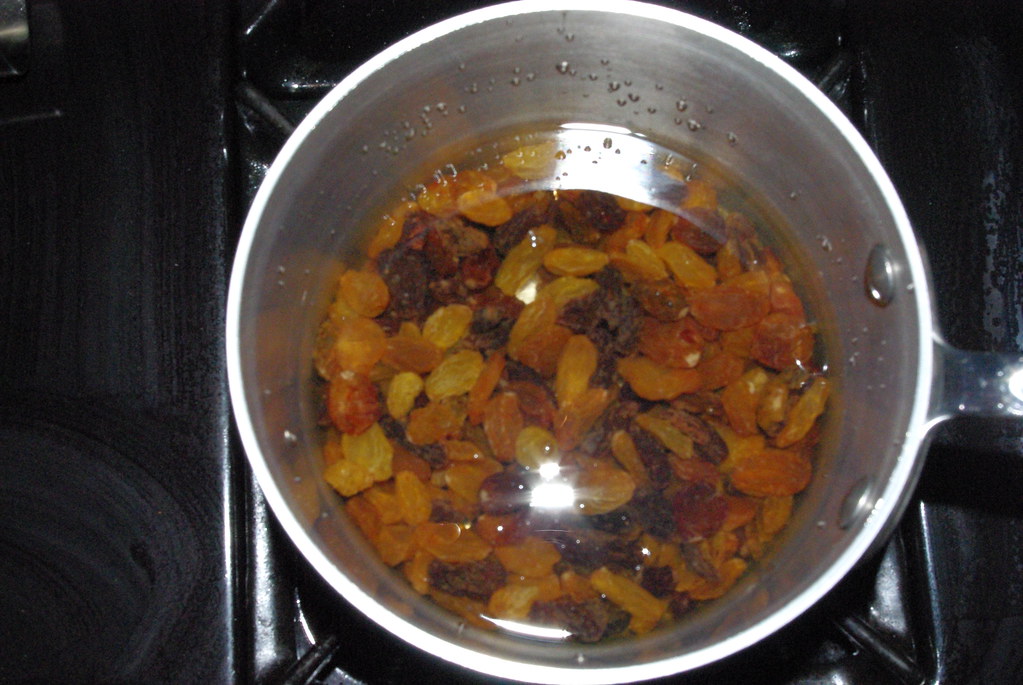
And sure enough, it does work. The raisins got plump and fat.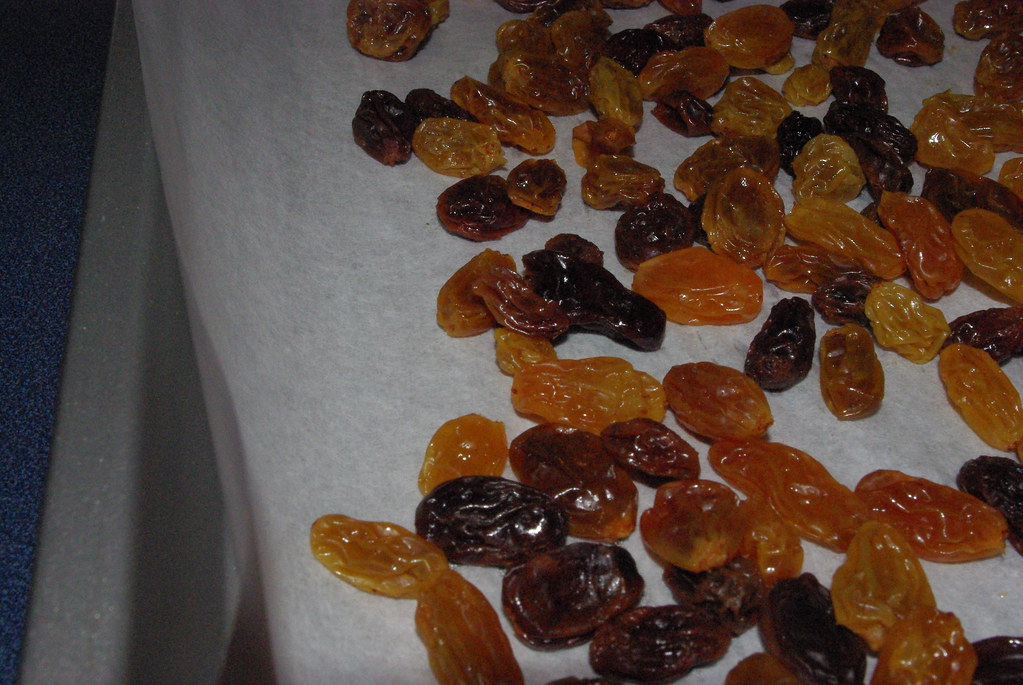
I'll save you the whisking, kneading and rising descriptions, as you all are probably pretty used to that by now. If you're curious as to the exact steps, reference the recipe below. Just know that this dough rises like crazy...it was trying to escape my bowl!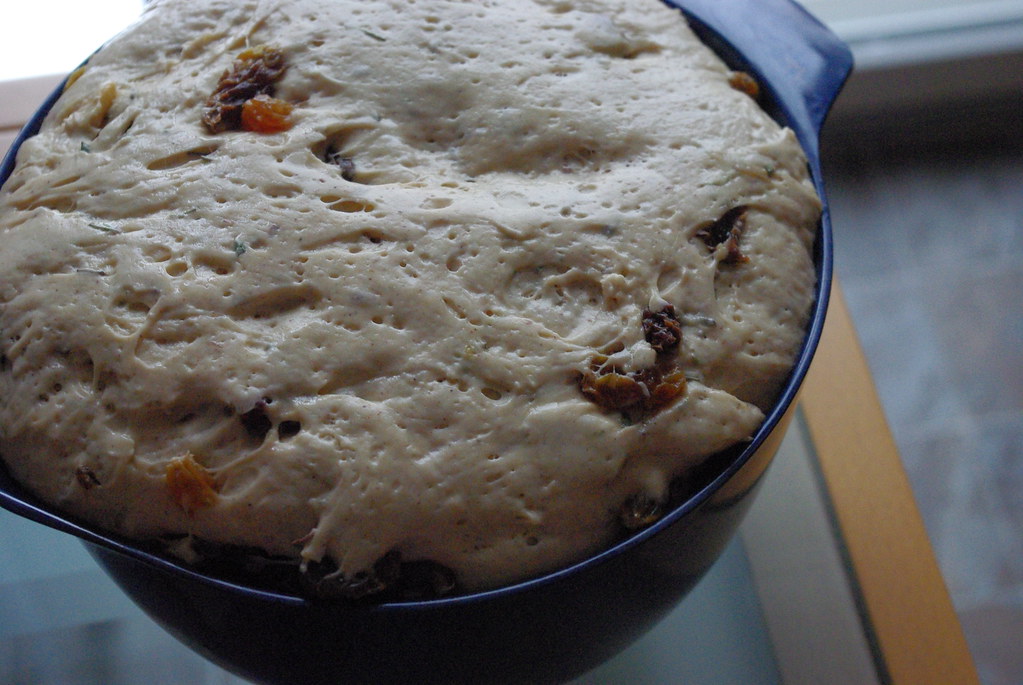
The focaccia is baked in a 9x13 pan, so you come out with a huge rectangle. It baked very well and was a perfect golden brown.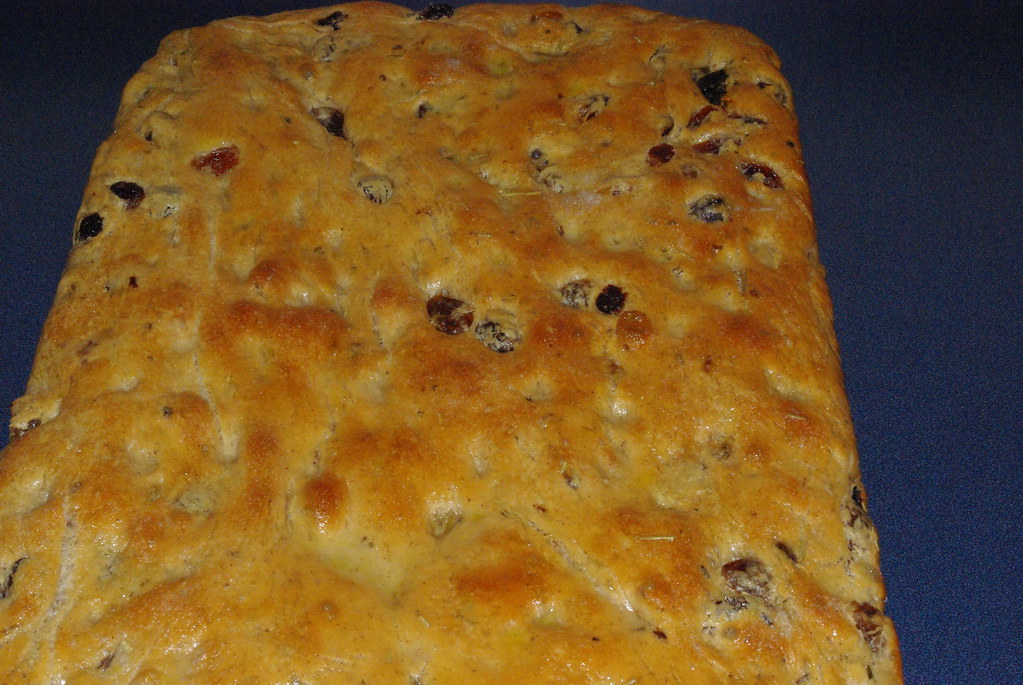
While this version is definitely for breakfast since it's more sweet, I'm going to try out a more savory version we can use to make sandwiches (or pizza, as they do in northern Italy!).
Recipe #7: Raisin, Rosemary, and Cinnamon Focaccia
Ingredients
2 cups plump, sweet raisins
2 1/4 cups warm whole milk
1 teaspoon sugar
1 tablespoon active dry yeast
5 cups bread flour or unbleached all-purpose flour
3 tablespoons olive oil, plus additional for brushing
2 bunches fresh rosemary, leaves removed and very finely chopped
1 1/2 teaspoons ground cinnamon
1 teaspoon salt
2 or 3 tablespoons sanding sugar or turbinado sugar
1. To plump the raisins if they seem dry (if not, continue to next step): Place the raisins in a medium saucepan with water to cover. Bring the water to a boil, then turn off the heat, cover the pan, and let the raisins sit for 5 minutes. Drain the raisins in a colander set in the sink and shake off any excess water. Spread the raisins on a baking sheet and let cool.
2. Make the dough: Combine the warmed milk and sugar in the bowl of a stand mixer and sprinkle the yeast over the top. Whisk in 1/4 cup of the flour by hand. Let sit for 10 minutes, or until the yeast is activated and foamy or bubbling. Whisk in another 2 cups of flour, or enough that the dough resembles a thick pancake batter. Attach the paddle attachment and mix on low speed for 4 minutes.
3. Add the raisins, olive oil, rosemary, cinnamon, and salt to the dough, attach the dough hook, and knead the dough on low until well blended. Add the remaining 2 3/4 cups flour and knead for 2 minutes. Scrape down the sides of the bowl and turn the dough over in the bowl so everything is mixed evenly. Continue to knead for 2 minutes longer. Don't worry if the dough sticks to the side of the bowl--the extra moisture gives the crumb an open and chewy texture that is the signature of a good focaccia.
4. Lightly oil a bowl, scrape the dough into the bowl and lightly cost the surface of the dough with a little oil. Cover the bowl tightly with plastic wrap and let the dough rise until doubled, about 1 to 1 1/2 hours.
5. Scrape the risen dough onto a baking sheet covered with parchment paper. Lightly oil your hands and press down on the dough firmly to expel some of the air bubbles, but don't knead the dough again. Begin to push and gently stretch the dough into an even layer in the pan. To stretch the dough into the corners of the pan, slip your hand under the dough and pull gently form the center of the dough toward the corner. As you reach the corner, grip the dough and gently shake it up and down as you pull outward--this will help to stretch the dough while preventing it from tearing. Repeat until the dough is in an even layer filling the pan all the way into the corners. You may not be able to stretch it into the corners on the first try. If the dough begins to pull back and resist the stretching, brush the top with a little olive oil, set the pan aside for 10 minutes, and then try again.
6. Brush the top of the dough with a little olive oil and cover the pan with plastic wrap. Let the dough rise until almost doubled in size (it will look quite puffy and bubbly).
7. Preheat the oven to 375 degrees.
8. Remove the plastic wrap. Dimple the dough by gently pressing your fingertips into the dough, about 1/2-inch deep, taking care that you don't deflate the dough by pressing too vigorously or making too many indentations.
9. Sprinkle the dough with the sanding sugar. Bake for 30 to 35 minutes, or until the bread is a deeo golden brown and cooked through. The internal temperature should register 200 degrees. Transfer to a rack and immediately brush the top with olive oil. Let cool 10 minutes before serving. Cut the focaccia with a serrated knife.
Source: The Art and Soul of Baking
0 comments:
Post a Comment