Sunday Snapshots #3
A couple of weeks ago, Nate and I spent an entire Saturday trimming our willow trees. Here is the fruit of our labor....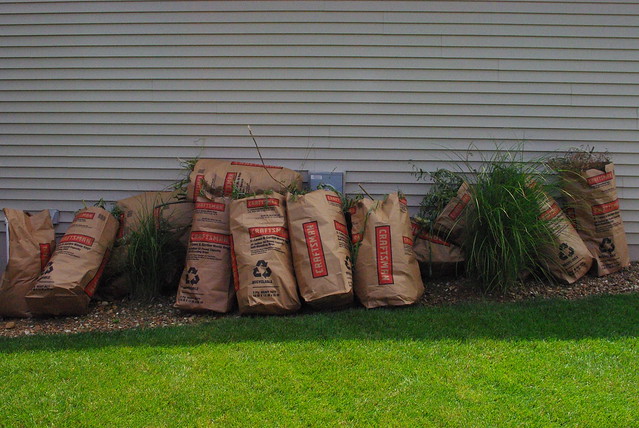
Nate also pulled some mammoth weeds. I mean, are you kidding me?
Happy Sunday!

A couple of weeks ago, Nate and I spent an entire Saturday trimming our willow trees. Here is the fruit of our labor....
Nate also pulled some mammoth weeds. I mean, are you kidding me?
Happy Sunday!
All the pieces fell into place for me to capture a few shots of this gorgeous butterfly. I happened to be walking by the patio door on my way to the kitchen for some lunch when I noticed this large guy. And my camera happened to be right there on the kitchen counter from my scone baking adventure this morning....
I love butterflies.


Happy Sunday!

This recipe wins out as one of my favorites out of all the recipes I've made so far. I certainly have a sweet tooth and these sticky buns were the perfect combination of warm and sweet. In fact, these were very dangerous to keep on hand due to the fact I would have eaten them all, so my co-workers were loving me after I brought these in to share.
And best of all, this finishes off Chapter 3 (Chapters 1 & 2 were merely instructional, so Chapter 3 is the first chapter of real baking) of The Art and Soul of Baking. A milestone indeed! Don't ask me how many more the book contains. Let's just say it's 454 pages.
Anyway, back to the buns. The insides were filled with a creamed butter, brown sugar and cinnamon mixture. Yum.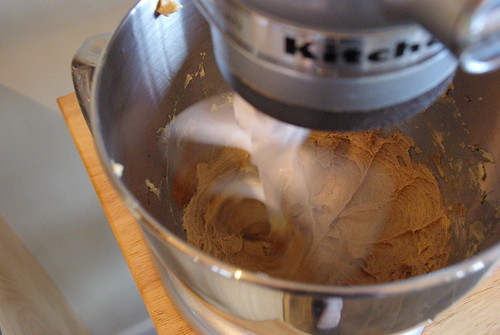
Here's the dough all ready to be rolled into a cylinder and cut.
Here are the rolls after they've been cut and flattened, sitting on top of the filling in the pan all ready for their rise.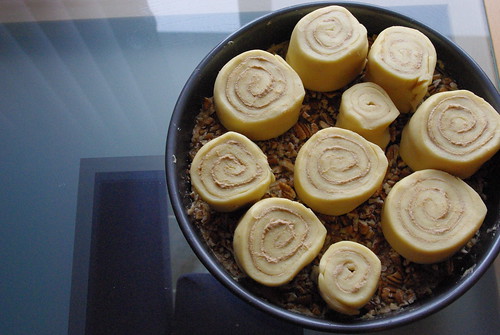
And finally, the finished product. They are so pretty, aren't they?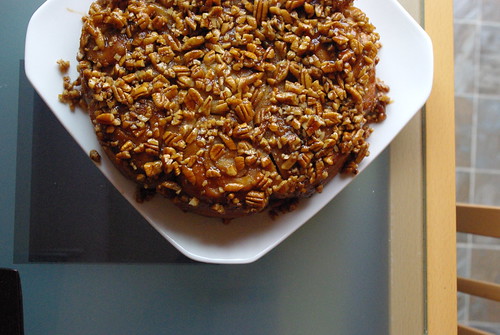
Lovely for breakfast, the deep caramel flavor of the real maple syrup paired with pecans is to die for. You should make these now!
Recipe #12: Maple-Pecan Sticky Buns
Ingredients
1 recipe Rich Breakfast Dough (see below)
Topping
3/4 stick unsalted butter, softened
1/3 cup firmly packed light brown sugar
1/3 cup maple syrup
1 cup chopped pecans
Filling
1/2 stick unsalted butter, softened
1/3 cup firmly packed light brown sugar
1/2 teaspoon ground cinnamon
1. Make the topping: Place the butter and brown sugar in the bowl of a stand mixer and blend on medium speed until the mixture is smooth and slightly lightened, 2 to 3 minutes. Scrape down the bowl. With the mixer running on medium, pour the maple syrup in a thin stream down the side of the bowl and blend until smooth and homogenous. Scrape the topping into a 10-inch round cake pan and spread evenly. Scatter the chopped pecans over the top. Set aside while you make the buns.
2. Roll the dough: Dust your work surface with flour. Turn the risen dough out of the bowl and onto the flour. Press down firmly with your hands to expel as much of the gas as possible, but don't knead the dough or the gluten will be too developed for the dough to roll easily. Dust the top of the dough with flour. Roll the dough into a 10-by-16-inch rectangle. Position the dough so that one of the long sides is parallel to the edge of your work surface. Brush any remaining flour from the surface and underside of the dough.
3. Make the filling: Place the butter, brown sugar, and cinnamon in the bowl of a stand mixer and blend on medium speed until the mixture is smooth and slightly lightened, 2 to 3 minutes. Scrape down the bowl. Use a silicone or rubber spatula to spread the filling over the dough, leaving a 1-inch border along the long side opposite you.
4. Shape the buns: Beginning with the long edge closest to you, roll the dough into a cylinder, gently tucking and tightening as you roll. Wet your fingers and rub a thin film of water along the empty border. Finish rolling the dough onto the border. Roll the dough backwards so that the seam is facing upward and pinch all along it to seal the dough. Turn the seam side down and use a chef's knife to cut the roll into 10 equal pieces. Set each bun with a cut side up on your work surface and gently flatten it slightly with the palm of your hand. Place the buns into the prepared cake pan, spacing them evenly.
5. Proof the dough (second rise): Cover the pan loosely with plastic wrap and set aside to rise until the rolls have almost doubled in size 45 to 60 minutes.
6. Bake the sticky buns: Preheat the oven to 350 degrees and position an oven rack in the center. Bake the buns for 30 to 35 minutes, until the buns are deep golden brown and the centers register 185 degrees on an instant-read thermometer. Transfer to a cooling rack for 5 minutes, then turn the buns out of the pan. To do this, run a thin knife or small spatula around the edge of the pan to loosen the buns. Place a large plate or rimmed baking sheet upside down on top of the cake pan. Wearing oven mitts, hold the cake pan against the plate and invert it. The sticky buns will fall out of the pan onto the plate, along with their syrup and nuts. Serve the sticky buns warm or room temperature.
---------------------------------------
Rich Breakfast Dough
Ingredients
1/2 cup warm whole milk
1/4 cup sugar
1 1/2 teaspoons active dry yeast
1 large egg plus 1 egg yolk, at room temperature
2 1/2 cups bread flour
1/2 teaspoon salt
1 stick unsalted butter, very soft
1. Mix and knead the dough: Combine the warm milk and sugar in the bowl of the stand mixer and sprinkle the yeast over the top. Whisk by hand to blend well. Let the mixture sit for 5 to 10 minutes, until the yeast is activated and foamy or bubbling. Add the egg and yolk and whisk by hand until well blended. Stir in the flour and salt with a silicone or rubber spatula. Attach the dough hook and knead on low speed for 2 minutes. The dough may look ragged at this point, but don't worry--the addition of butter will smooth it out. Increase the speed to medium and knead for 1 minute. With the mixer running, add the soft butter, 1 tablespoon at a time, allowing each addition to blend in before adding the next. Once all the butter has been added, decrease the speed to medium-low and continue to knead for 5 to 6 minutes longer, until the dough looks soft and silky.
2. Rise the dough (first rise): Lightly butter a bowl, scrape the dough into the bowl, and brush the surface of the dough with a little butter or oil. Cover with plastic wrap and let the dough rise until doubled, 1 to 1 1/2 hours. At this point, the dough is ready to be punched down and used in your recipe of choice.
Source: The Art and Soul of Baking

This bread has a very rustic look which I think is enticing. You basically roll the filled dough into a cylinder, cut it up into chunks and throw it in the pan. No neatness needed here!
I loved the way it turned out. The classic combination of the sweet currants with the warm cinnamon made this perfect for breakfast.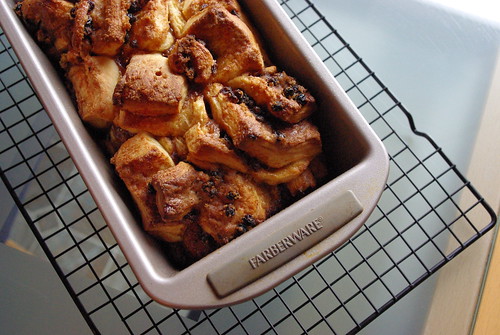
Recipe #11: Cinnamon-Currant Bread
Ingredients
1 recipe Rich Breakfast Dough (see below)
1 large egg, lightly beaten
1/2 cup firmly packed light brown sugar
2 teaspoons ground cinnamon
1/2 cup currants
1. Roll the dough: Turn the dough onto a work surface dusted with flour. Press down firmly to expel some of the air bubbles, but don't knead the dough. Dust with flour and roll into a 12 by 15-inch rectangle. Position the dough so that one of the long sides is parallel to the edge of your work surface. Brush any flour from the surface and underside of the dough.
2. Fill the dough: Brush the dough evenly with a thin film of beaten egg, leaving a 1-inch border along the edge of the dough opposite you. In the small bowl, mix the brown sugar and cinnamon. Sprinkle this mixture over the egg glaze, then spread it with your fingers into an even layer. Scatter the currants evenly over the top.
3. Shape the loaf: Beginning with the long edge closest to you, roll the dough into a tight cylinder, gently tucking an tightening as you roll. Wet your fingers a rub a thin flim of water along the empty border. Finish rolling the dough onto the border. Roll the dough backwards so that the seam is facing upward and pinch all along it to seal the dough. Use a chef's knife to slice the cylinder in half lengthwise, then crosswise into about 12 pieces. Generously butter a loaf pan and transfer the pieces to the pan. Try to arrange the bottom layer dough-side down to make it easier to remove the bread from the pan after baking and to prevent the sugar from burning on the bottom of the pan. Otherwise, just toss them in every which way. Level the top the best you can, but a rugged look is fine.
4. Proof the dough: Cover the pan loosely with plastic wrap and allow to rise until the dough reaches about 1/4 inch below the rim of the pan, 1 to 1 1/2 hours.
5. Bake the bread: Preheat the oven to 350 degrees and position an oven rack in the center. Bake the loaf for 35 to 45 minutes, until an instant-read thermometer inserted into the center of the bread registers 190 degrees. Transfer to a rack and cool for 15 minutes, then turn the loaf out of the pan onto a piece of parchment paper to cool completely.
---------------------------------------
Rich Breakfast Dough
Ingredients
1/2 cup warm whole milk
1/4 cup sugar
1 1/2 teaspoons active dry yeast
1 large egg plus 1 egg yolk, at room temperature
2 1/2 cups bread flour
1/2 teaspoon salt
1 stick unsalted butter, very soft
1. Mix and knead the dough: Combine the warm milk and sugar in the bowl of the stand mixer and sprinkle the yeast over the top. Whisk by hand to blend well. Let the mixture sit for 5 to 10 minutes, until the yeast is activated and foamy or bubbling. Add the egg and yolk and whisk by hand until well blended. Stir in the flour and salt with a silicone or rubber spatula. Attach the dough hook and knead on low speed for 2 minutes. The dough may look ragged at this point, but don't worry--the addition of butter will smooth it out. Increase the speed to medium and knead for 1 minute. With the mixer running, add the soft butter, 1 tablespoon at a time, allowing each addition to blend in before adding the next. Once all the butter has been added, decrease the speed to medium-low and continue to knead for 5 to 6 minutes longer, until the dough looks soft and silky.
2. Rise the dough (first rise): Lightly butter a bowl, scrape the dough into the bowl, and brush the surface of the dough with a little butter or oil. Cover with plastic wrap and let the dough rise until doubled, 1 to 1 1/2 hours. At this point, the dough is ready to be punched down and used in your recipe of choice.
Source: The Art and Soul of Baking

Talk about a recipe with a lot of steps! This one is kind of time consuming, so make sure if you're going to make the commitment, you block out the time for it. You could always make the dough and refrigerate overnight and then make the coffee cake the next day.
Once you get past the dough making stage, the rest is fun. You get to play with fillings!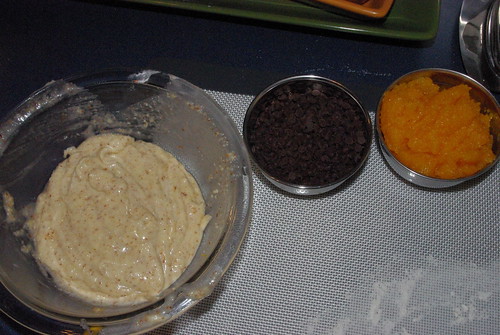
Aren't the fillings pretty and colorful? For those of you that aren't familiar with almond paste, it is so good. Think the smell of almond extract. Yum.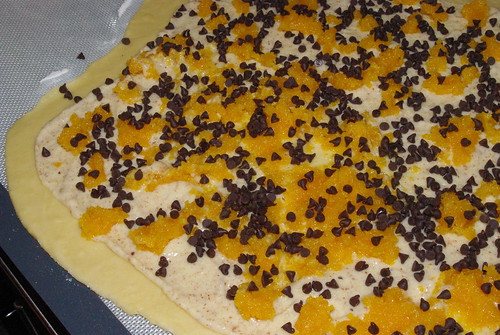
Here's the coffee cake as it's ready to go in the oven. Looking back, I think the sections were supposed to be laid almost flat per the directions, but this worked okay too.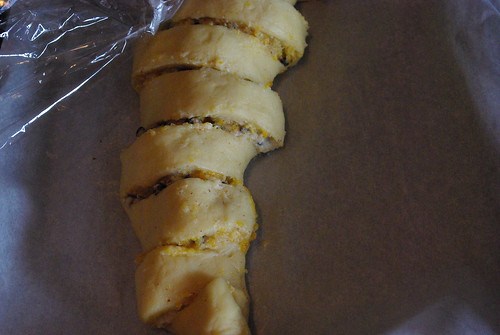
And the finished product. It was very tasty. I was a little worried about the apricot and chocolate combination, but the two ingredients complimented each other nicely.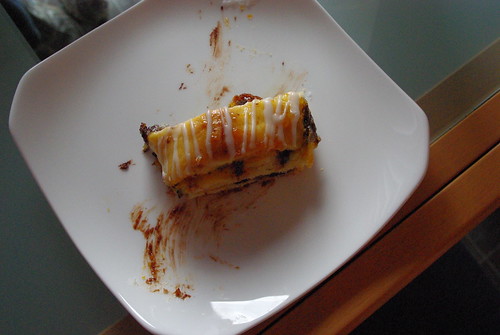
Recipe #10: Apricot, Almond, and Chocolate Spiraled Coffee Cake
Ingredients
1 recipe Rich Breakfast Dough (see below)
Filling
8 ounces dried California apricots
3 tablespoons water
3 tablespoons amaretto
7 ounces almond paste, at room temperature
1/2 cup granulated sugar
3/4 stick unsalted butter, softened
1/2 cup mini semisweet chocolate chips
Apricot Glaze
3 tablespoons apricot jam
1 tablespoon water
Sugar Glaze
1/2 cup unsifted confectioners' sugar
1 teaspoon warm water
1. Plump the apricots for the filling: Place the apricots in the bowl of a food processor and process until they are chopped into tiny pieces (or use an oiled chef's knife to chop them very finely). In a small saucepan, heat the water and amaretto over medium heat just until it begins to simmer. Remove from the heat and add the chopped apricots. Let the mixture sit for about 5 minutes, stirring several times with a spatula, until the liquid has been completely absorbed. Transfer to a medium bowl to cool while you prepare the rest of the filing.
2. Make the filling: Cut or break the almond paste into 12 to 15 pieces. Place the almond paste and granulated sugar in the bowl of a food processor and process for 10 to 15 seconds, until the almond paste is cut into tiny pieces. Add the softened butter and process for 25 to 30 seconds, until the mixture is blended and smooth and forms a large ball. The filling will be very thick.
3. Shape the dough: Turn the dough out of the bowl onto a work surface dusted with flour. Press firmly to expel some of the air bubbles, but don't knead the dough again. Dust the dough with flour and roll into an 11 by 15-inch rectangle. Position the dough so that one of its long sides is parallel to the edge of your work surface. Brush any remaining flour from the surface and underside of the dough. Spread the almond filling in a thin layer over the dough, leaving a 1-inch border along the long side of the dough opposite you. Sprinkle the plumped apricot pieces over the filling as evenly as possible. Do the same with the mini chocolate chips.
4. Roll up the dough: Beginning with the long edge closest to you, roll the dough into a cylinder, gently tucking and tightening as you go. Wet your fingers and rub a thin film of water along the empty border. Finish rolling the dough onto the border. Roll the dough backwards so that the seam is facing upward and pinch all along it to seal the dough. Turn the seam to face awwy from you and, using the tip of a chef's knife, cut the dough into slices at 1 1/2-inch intervals, cutting only 3/4 of the way across the roll so the seam and is still intact--all the slices should be attached along a "spine." Gently lift the log of dough and center it on the prepared baking sheet, seam or "spine" down. Gently twist each slice away from the spine and lay it nearly flat on the sheet (the slices will overlap slightly and won't lie completely flat). Alternate the direction of the twists, one slice to the right, one slice to the left, until you reach the end. At first it will seem as though the roll is too long for the pan, but keep overlapping and you'll find you have room at the top and bottom of the coffee cake.
5. Proof the dough (second rise): Cover the dough loosely with plastic wrap and let rise until almost doubled in size and looks like it has taken a deep breath, 40 to 60 minutes.
6. Bake the coffee cake: Preheat the oven to 375 degrees and position an oven rack in the center of the oven. Bake the coffee cake for 20 to 25 minutes. until golden brown on the top and bottom (check the bottom by lifting the coffee cake slightly with a large metal spatula). Transfer to a cooling rack.
7. While the pasty is baking, make the apricot glaze: Heat the apricot jam and water a small saucepan over medium-low heat, stirring with a silicone or rubber spatula to blend, until hot and fluid. When the cake is out of the oven and on the rack, rewarm the glaze and brush it over the cake. Cool for 15 minutes, then apply another layer of the glaze. Allow the coffee cake to cool an additional 20 minutes before adding the sugar glaze.
8. Make the sugar glaze: In a medium bowl, stir the confectioners' sugar and warm water vigorously with a silicone or rubber spatula until there are no lumps remaining, adding a few more drops of water if needed. Use a fork to drizzle the glaze over the pastry, or transfer the glaze to a resealable plastic bag and squeeze it into one corner. Snip off the corner with a pair of scissors ans pipe lines decoratively across the coffee cake. Use two spatulas or a cake lifter to transfer the coffee cake to a serving platter. Serve warm or room temperature. Let guests tear off rolls, or slice with a serrated knife.
---------------------------------------
Rich Breakfast Dough
Ingredients
1/2 cup warm whole milk
1/4 cup sugar
1 1/2 teaspoons active dry yeast
1 large egg plus 1 egg yolk, at room temperature
2 1/2 cups bread flour
1/2 teaspoon salt
1 stick unsalted butter, very soft
1. Mix and knead the dough: Combine the warm milk and sugar in the bowl of the stand mixer and sprinkle the yeast over the top. Whisk by hand to blend well. Let the mixture sit for 5 to 10 minutes, until the yeast is activated and foamy or bubbling. Add the egg and yolk and whisk by hand until well blended. Stir in the flour and salt with a silicone or rubber spatula. Attach the dough hook and knead on low speed for 2 minutes. The dough may look ragged at this point, but don't worry--the addition of butter will smooth it out. Increase the speed to medium and knead for 1 minute. With the mixer running, add the soft butter, 1 tablespoon at a time, allowing each addition to blend in before adding the next. Once all the butter has been added, decrease the speed to medium-low and continue to knead for 5 to 6 minutes longer, until the dough looks soft and silky.
2. Rise the dough (first rise): Lightly butter a bowl, scrape the dough into the bowl, and brush the surface of the dough with a little butter or oil. Cover with plastic wrap and let the dough rise until doubled, 1 to 1 1/2 hours. At this point, the dough is ready to be punched down and used in your recipe of choice.
Source: The Art and Soul of Baking

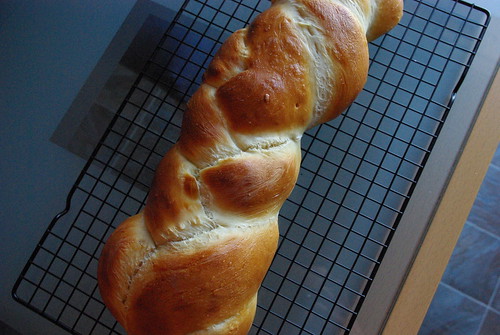
Challah is a braided loaf traditionally enjoyed at Friday night dinner in Jewish households. Kosher law forbids the serving of dairy with meat, so the classic challah is made with water instead of milk, and the crumb is tenderized with oil instead of butter.
This was really a fun loaf to make and certainly the most beautiful so far. The crumb was slightly more dense with the oil instead of butter and the taste wasn't as rich. But it was still moist and tender.
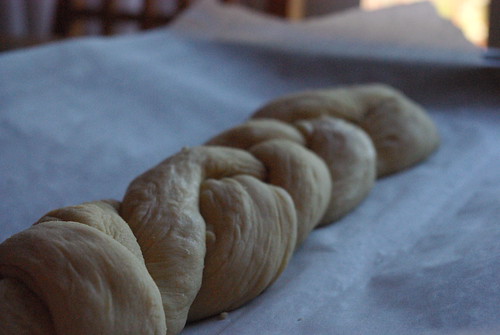
I loved the looked of the braided loaf. Here it is before baking.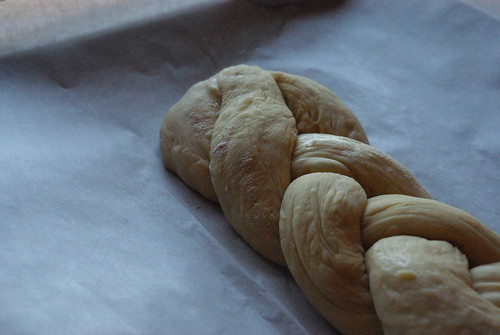
And here it is fresh out of the oven, golden brown from the egg wash I put on it before baking.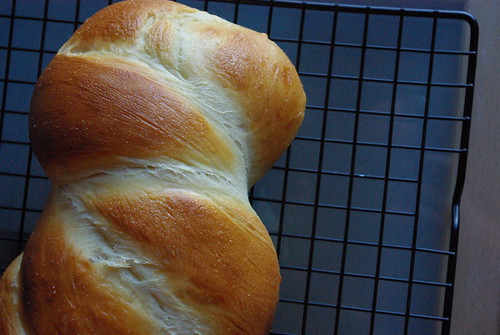
Recipe #9: Challah
Ingredients
3/4 cup warm water
2 tablespoons honey
1 1/2 teaspoons active dry yeast
2 large eggs, at room temperature
3 tablespoons neutral oil, such as canola or safflower
2 1/2 cups bread flour, plus more if needed
3/4 teaspoons salt
1 large egg, lightly beaten
2 teaspoons poppy seeds (optional)
1. Mix and knead the dough: Combine the warm water and honey in the bowl of a stand mixer and sprinkle the yeast over the top. Whisk by hand to blend well. Let the mixture sit for 5 to 10 minutes, until the yeast is activated and foamy or bubbling. Add the eggs and oil and whisk by hand until well blended. Stir in the flour and salt. Attach the dough hook and knead on low speed for 2 minutes, scraping down the bowl as necessary, until the dough begins to come together. Turn the speed to medium and knead for 6 to 8 minutes, until the dough is smooth, silky, and elastic. You may need to add a little extra flour, a tablespoon at a time, toward the end. The dough should begin to pull away from the sides of the bowl but still be slightly tacky.
2. Rise the dough (first rise): Lightly oil a tub or bowl, scrape the dough into the tub, and lightly coat the surface of the dough with a little oil. Cover with plastic wrap and let the dough rise until doubled in size, 45 to 60 minutes.
3. Punch down and shape the dough: Turn the dough out onto a lightly floured work surface. Press down on the dough firmly to expel some of the air bubbles, but don't knead the dough again or it will be too springy and difficult to shape. Divide the dough into 3 equal pieces. Work with one piece at a time and keep the others covered to prevent a skin from forming. Using flattened hands, roll each piece back and forth, forming a rope about 15 inches long with tapered ends. You may not be able to stretch each piece to the full length the first time; if that's the case, cover it and continue with another piece. Return to the first piece when you've finished the others and try stretching it a little more.
4. Line a baking sheet with parchment paper and lay the 3 ropes on the sheet with the ends facing you. Pinch together the three ends furthest from you. Braid the dough, pinching the loose ends together at the bottom. Gently stretch the ends outward so the center is plump with the ends are tapered. Tuck the ends under just slightly.
5. Proof the dough (second rise): Cover the braid loosely with plastic wrap. Allow the braid to rise until almost doubled in size and looks like it has taken a deep breath, 40 to 50 minutes.
6. Glaze and bake the challah: Preheat the oven to 375 degrees and position an oven rack in the center of the oven. Gently brush the entire surface of the braid with a light wash of beaten egg. Take care that there are no pools or drips of glaze. Sprinkle with the poppy seeds, if you like. Bake for 20 to 25 minutes, until the top and bottom are golden brown and the internal temperature registers 190 degrees on an instant-read thermometer. Transfer to a rack to cool completely. To serve, slice with a serrated knife.
Source: The Art and Soul of Baking

I have an aunt who is known for her dinner rolls. I can only hope to be as seasoned as her someday at making these. For my first attempt, however, I was extremely happy with the result. Soft, warm, buttery goodness. I mean, how can you go wrong?
The key ingredient to old fashioned dinner rolls is a russet potato. Here it is all cooked and ready to mash.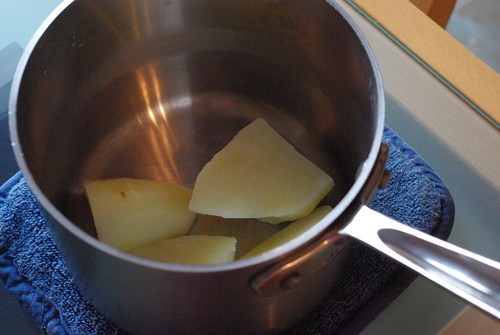
What makes up the dinner roll dough, you ask? See below.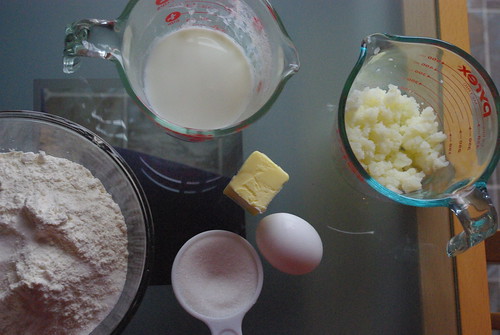
Here are the little buggers as they were put in the oven. I really need to work on my "shaping into balls" technique, but I'll get there.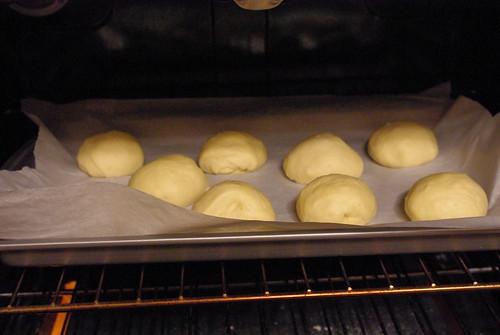
And here is the finished product. These were so good, I personally don't even think you need the extra butter. 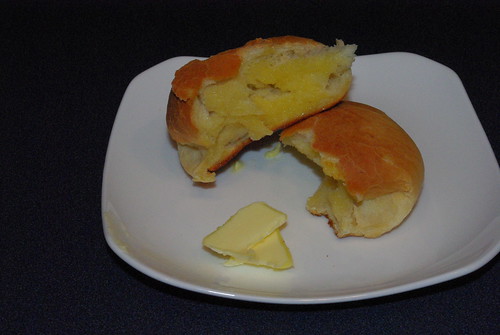
These make a great side to almost any home cooked meal. And you can freeze them for up to 3 weeks after baked, so one could always make a batch ahead of time to have on hand for the next time guests are entertained!
Recipe #8: Old-Fashioned Dinner Rolls
Ingredients
1 small (5 ounce) russet potato, peeled and quartered
1 1/2 teaspoons active dry yeast
1/4 cup sugar
1/2 stick (2 ounces) unsalted butter, very soft
1/2 cup warm whole milk
1 large egg, at room temperature
2 1/2 cups bread flour, plus more as needed
1/2 teaspoon salt
1. Cook the potato: Put the quartered potato in a small saucepan, cover with water, and set over medium heat. Bring to a simmer and cook for 15 to 20 minutes, until the tip of a paring knife slides in and out easily. Drain well, reserving 1/4 cup of the cooking water. Return the potato to the pan and mash using a potato masher or fork. Set aside to cool to room temperature.
2. Mix and knead the dough: Warm the reserved potato water to 110 to 115 degrees and pour in to the bowl of a stand mixer. Add the yeast and 1 teaspoon of the sugar and whisk by hand to blend. Allow the mixture to sit for 10 minutes, or until the yeast is activated and foamy or bubbling. Measure 1/2 cup mashed potatoes and add to the bowl. Add the remaining sugar, butter, milk, and egg and whisk by hand until well blended. Add the flour and salt and knead on low speed for 2 to 3 minutes, until the dough begins to come together. It will seem sticky. With the mixer on low, add additional flour, a tablespoon at a time, until the dough begins to pull away from the sides of the bowl. Turn the speed to medium-low and continue to knead until the dough feels firm, dense, and springy, 5 to 6 minutes. Note: This dough is soft and sticky and will not pull away from the sides completely. Do not overknead or the starch from the potato will break down and make the dough gooey.
3. Rise the dough (first rise): Lightly butter or oil the tub or bowl, scrape the dough into the tub, and lightly coat the surface of the dough with a little butter or oil. Cover with plastic wrap and let the dough rise until doubled in size, 45 to 60 minutes.
4. Punch down and chill the dough: Turn the dough out onto a lightly floured work surface. Press down on the dough firmly to expel some of the air bubbles. Chill, covered, for at least 2 hours and up to overnight, or until the dough is very cold.
5. Shape the dough: Cut the dough into 3-ounce portions (about 1/3 cup) and shape each into a taut, round ball. Line a baking sheet with parchment paper and position the rolls on the sheet about 3 inches apart.
6. Proof the dough (second rise): Cover the rolls loosely with plastic wrap and let rise until almost doubled in size, 35 to 45 minutes.
7. Bake the rolls: Preheat the oven to 375 degrees and position an oven rack in the center of the oven. Bake the rolls for 10 minutes. Rotate the pan and continue to bake for 10 to 15 minutes longer, until the rolls are golden brown and their internal temperature registers 200 degrees on an instant-read thermometer. Transfer to a cooling rack. Serve warm or at room temperature.
Source: The Art and Soul of Baking
It's been the hottest weekend of the year here in St. Louis. But the wildflowers and hibiscus are loving the hot temps!

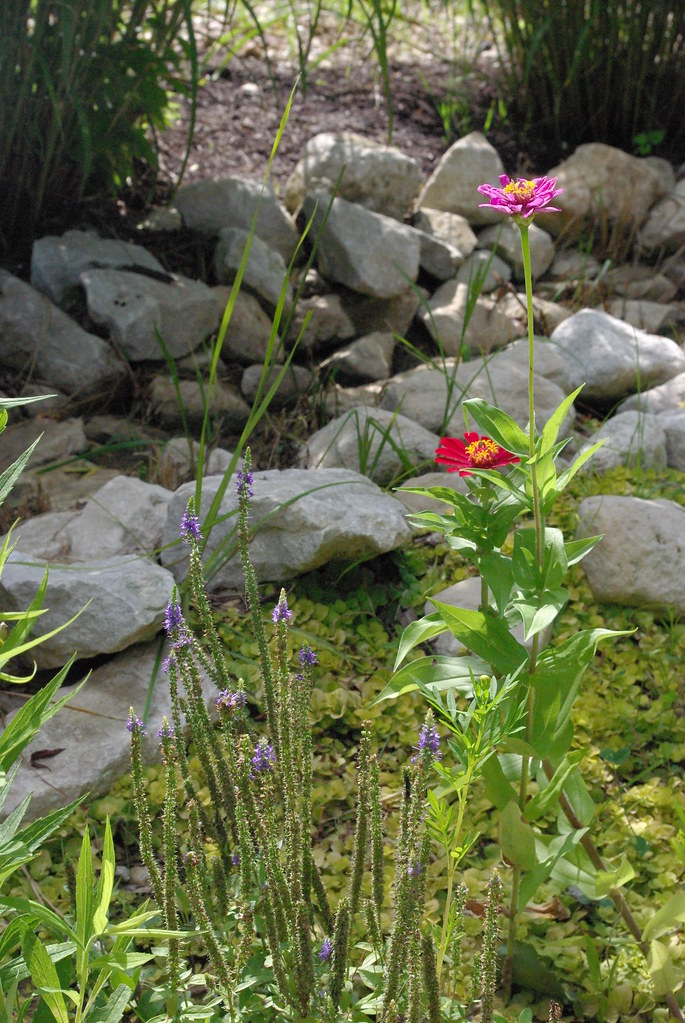
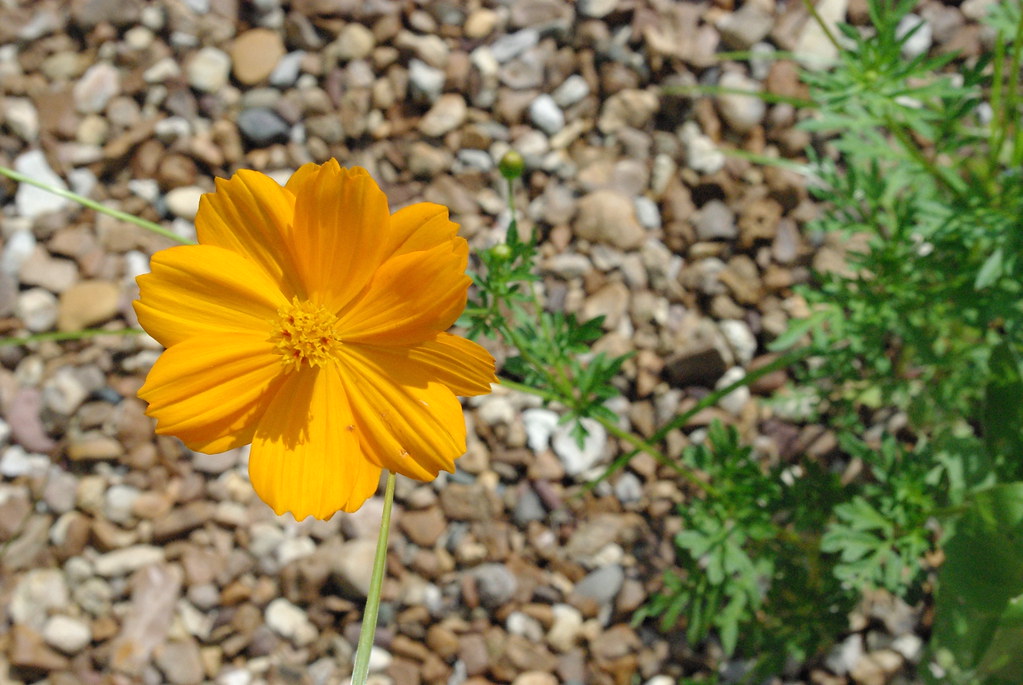

I'm thinking of making Sunday Snapshots a weekly posting on my blog. It'll get me to practice photography more and blog more. Sounds like a great idea to me!

I made this recipe way back in February, so that gives you an idea of how far behind I am in telling you about all the wonderful things I've been baking. However, this is kind of fitting now because we saw a lot of different focaccia in northern Italy. I got plently of inspiration as to how I can tweak this recipe by adding other things like tomatoes, garlic, etc. In fact, in addition to the bear claws that are the next thing I'm making this weekend, I'm going to attempt re-making this focaccia recipe with some different add-in's.
This recipe had raisins in it, which if I'm being honest I'm not a big fan of. However, mixed in with the cinnamon and rosemary flavors in the bread, I could actually handle. The bread was quite tasty and the raisins made it even more moist.
The first step, if you want to plump up your raisins a bit, is to soak them in water you bring up to a boil.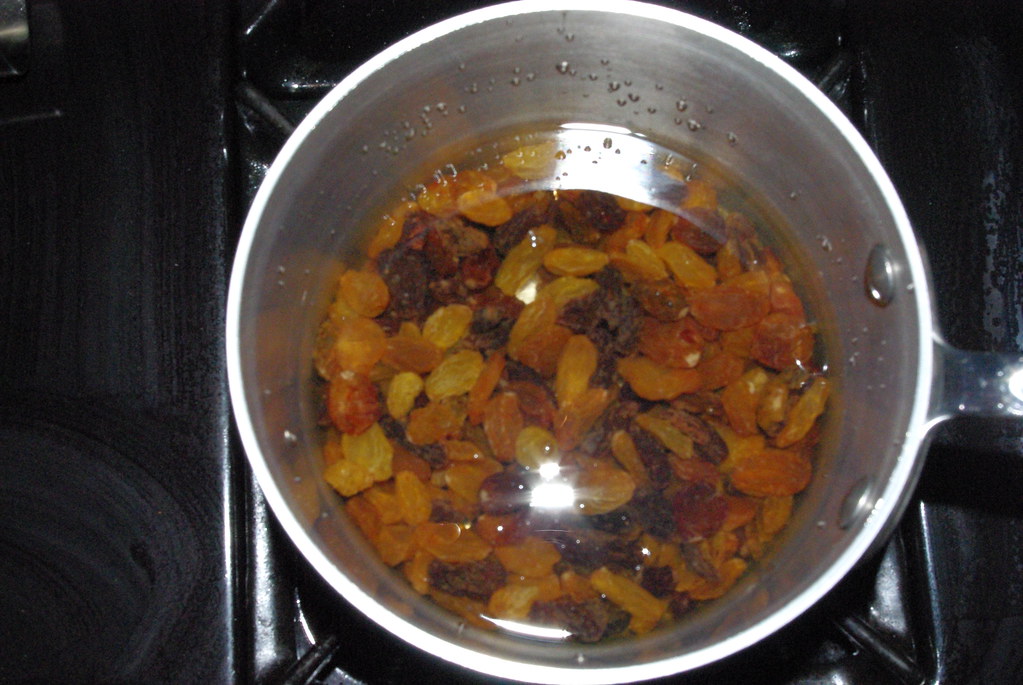
And sure enough, it does work. The raisins got plump and fat.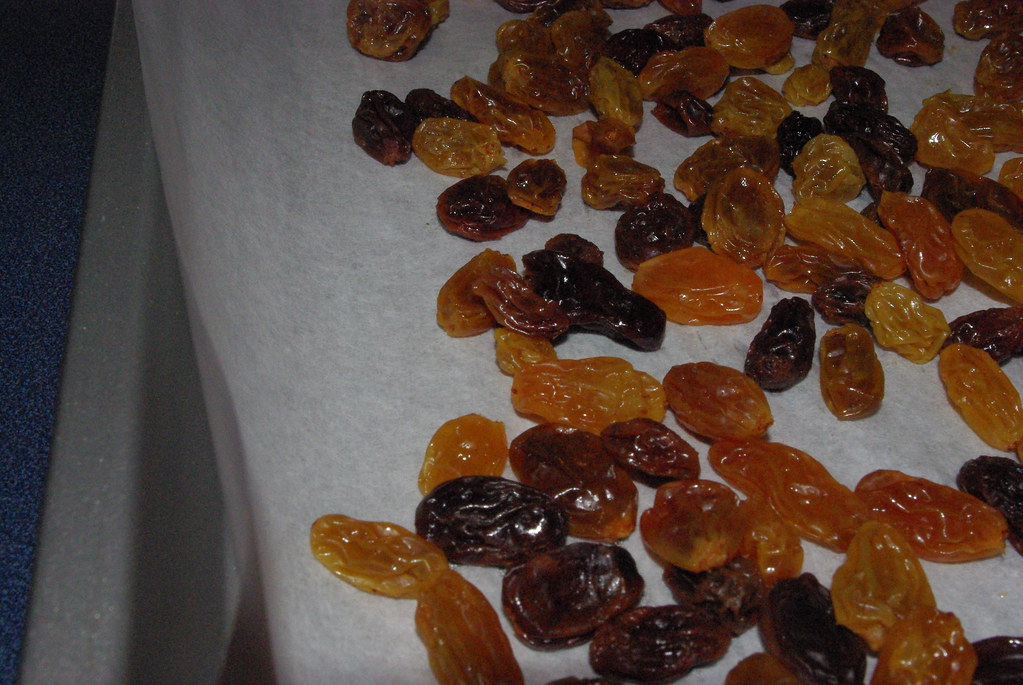
I'll save you the whisking, kneading and rising descriptions, as you all are probably pretty used to that by now. If you're curious as to the exact steps, reference the recipe below. Just know that this dough rises like crazy...it was trying to escape my bowl!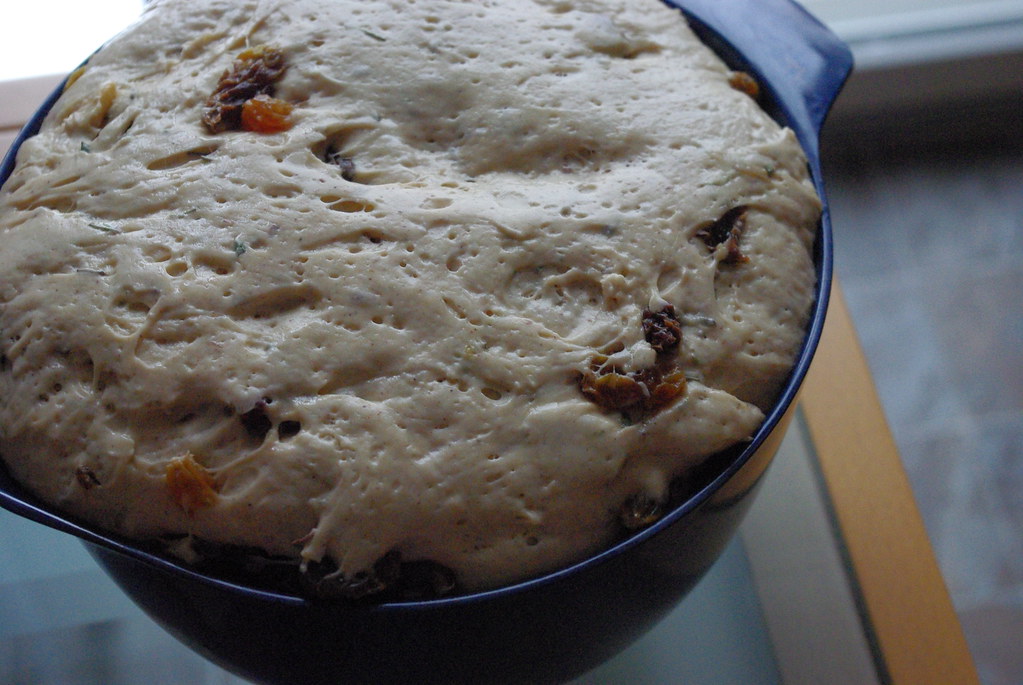
The focaccia is baked in a 9x13 pan, so you come out with a huge rectangle. It baked very well and was a perfect golden brown.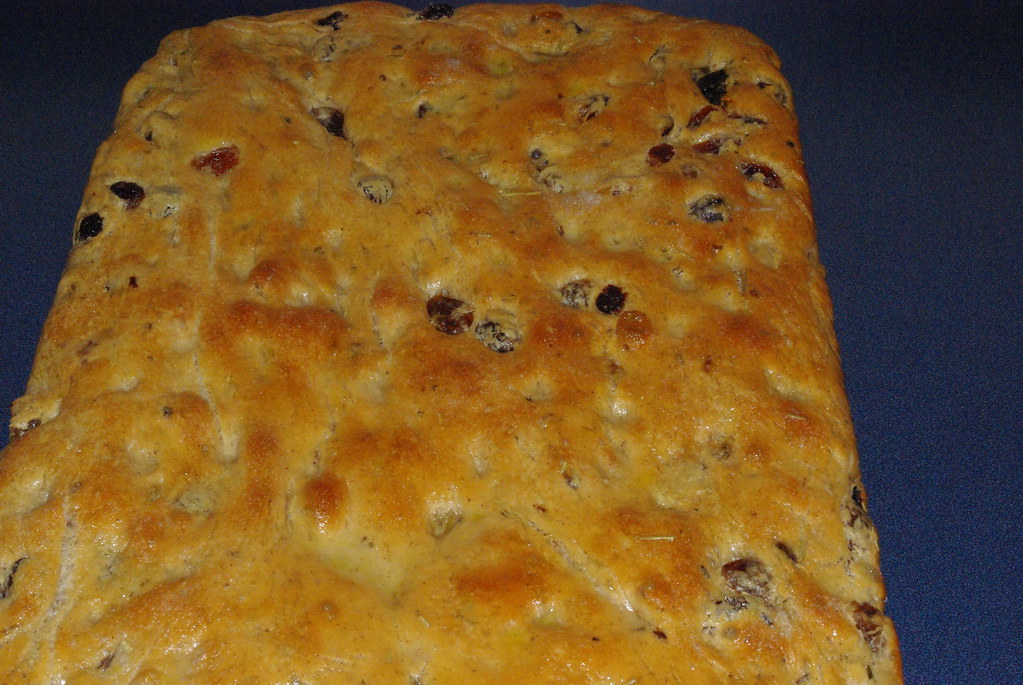
While this version is definitely for breakfast since it's more sweet, I'm going to try out a more savory version we can use to make sandwiches (or pizza, as they do in northern Italy!).
Recipe #7: Raisin, Rosemary, and Cinnamon Focaccia
Ingredients
2 cups plump, sweet raisins
2 1/4 cups warm whole milk
1 teaspoon sugar
1 tablespoon active dry yeast
5 cups bread flour or unbleached all-purpose flour
3 tablespoons olive oil, plus additional for brushing
2 bunches fresh rosemary, leaves removed and very finely chopped
1 1/2 teaspoons ground cinnamon
1 teaspoon salt
2 or 3 tablespoons sanding sugar or turbinado sugar
1. To plump the raisins if they seem dry (if not, continue to next step): Place the raisins in a medium saucepan with water to cover. Bring the water to a boil, then turn off the heat, cover the pan, and let the raisins sit for 5 minutes. Drain the raisins in a colander set in the sink and shake off any excess water. Spread the raisins on a baking sheet and let cool.
2. Make the dough: Combine the warmed milk and sugar in the bowl of a stand mixer and sprinkle the yeast over the top. Whisk in 1/4 cup of the flour by hand. Let sit for 10 minutes, or until the yeast is activated and foamy or bubbling. Whisk in another 2 cups of flour, or enough that the dough resembles a thick pancake batter. Attach the paddle attachment and mix on low speed for 4 minutes.
3. Add the raisins, olive oil, rosemary, cinnamon, and salt to the dough, attach the dough hook, and knead the dough on low until well blended. Add the remaining 2 3/4 cups flour and knead for 2 minutes. Scrape down the sides of the bowl and turn the dough over in the bowl so everything is mixed evenly. Continue to knead for 2 minutes longer. Don't worry if the dough sticks to the side of the bowl--the extra moisture gives the crumb an open and chewy texture that is the signature of a good focaccia.
4. Lightly oil a bowl, scrape the dough into the bowl and lightly cost the surface of the dough with a little oil. Cover the bowl tightly with plastic wrap and let the dough rise until doubled, about 1 to 1 1/2 hours.
5. Scrape the risen dough onto a baking sheet covered with parchment paper. Lightly oil your hands and press down on the dough firmly to expel some of the air bubbles, but don't knead the dough again. Begin to push and gently stretch the dough into an even layer in the pan. To stretch the dough into the corners of the pan, slip your hand under the dough and pull gently form the center of the dough toward the corner. As you reach the corner, grip the dough and gently shake it up and down as you pull outward--this will help to stretch the dough while preventing it from tearing. Repeat until the dough is in an even layer filling the pan all the way into the corners. You may not be able to stretch it into the corners on the first try. If the dough begins to pull back and resist the stretching, brush the top with a little olive oil, set the pan aside for 10 minutes, and then try again.
6. Brush the top of the dough with a little olive oil and cover the pan with plastic wrap. Let the dough rise until almost doubled in size (it will look quite puffy and bubbly).
7. Preheat the oven to 375 degrees.
8. Remove the plastic wrap. Dimple the dough by gently pressing your fingertips into the dough, about 1/2-inch deep, taking care that you don't deflate the dough by pressing too vigorously or making too many indentations.
9. Sprinkle the dough with the sanding sugar. Bake for 30 to 35 minutes, or until the bread is a deeo golden brown and cooked through. The internal temperature should register 200 degrees. Transfer to a rack and immediately brush the top with olive oil. Let cool 10 minutes before serving. Cut the focaccia with a serrated knife.
Source: The Art and Soul of Baking
Now that we're back from our Italy vacation, I'm going to finally post about our trip to Florida the end of March! ![]()
The last weekend of March we escaped what up until that point had been rainy weekends in St. Louis and headed south to warmth and sunshine! It had been 2 years since we'd visited our good friends and old neighbors Kevin & Deanna and their adorable kids.
Although we had good intentions of arriving at a reasonable hour, our flight out of St. Louis left 2 hours late.....so we were destined for a McDonald's fast food dinner run once we got to Orlando. That's really the only thing that went awry on our trip though...well, that and my bright red sunburn....so I guess I shouldn't complain....much.
The purpose of the trip was a dual one and the second purpose was.....baseball! We were able to catch 2 Cardinals spring training games under the gorgeous Florida sun. The Friday game we attended was at the Washington Nationals home field in Melbourne.
[Space Coast Stadium]
We sat out in the bleachers, but honestly those parks are so small there can't be a bad seat in the house.
As it was a Friday during Lent, I was drooling over everyone's hot dogs while eating meatless nachos. But I did enjoy a cold beer, so that's something....
We enjoyed taking in the game and I was having a ball snapping pictures as I sat watching. We were in the prime zone for foul balls coming from left-handed hitters, but nothing ever even got close. Bummer.


The Cardinals ended up losing, but Nate stuck around and snapped some pictures of the players signing autographs on their way out to the team bus. Unfortunately for us, we were not autograph ready the Friday game and that was our prime chance for getting autographs.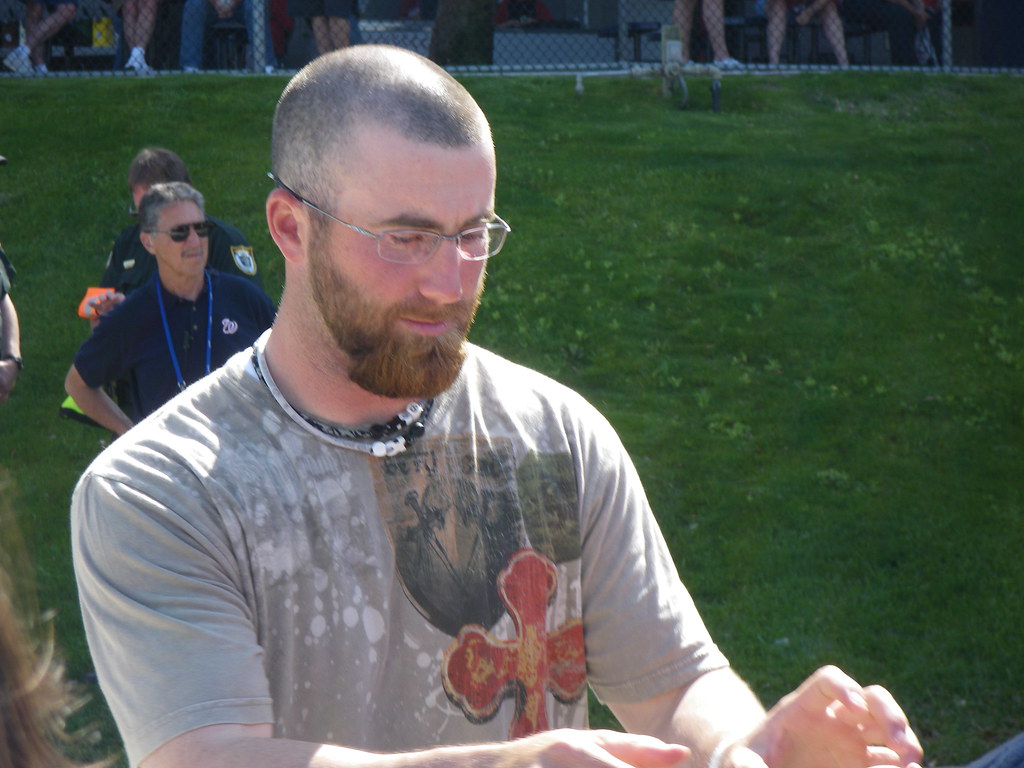
[Jason Motte]
[Adam Wainwright]
With Saturday came another sunny day and a road trip for Nate and I to catch the Cardinals at their home stadium in Jupiter.
[Roger Dean Stadium]
We went down pretty early to catch batting practice and warm ups and I roamed the grounds snapping pictures. One of the field maintanace guys even game me a used baseball. How cool.


I was really getting into my photos during this game with my 12x zoom lens. It feels like you're much closer to the players since the fields (well, at least the available seating) are much smaller than the major league parks.


We did get to see a win on Saturday, as well as play from most of the likely "starting lineup." My sunburn, which increased as the night wore on, pretty much matched the color of my dress. How lovely.
On Sunday, we spent the day at the beach where I shivered like a maniac and huddled under a towel for warmth [damn sunburn]. But it was cute seeing the kids play in the water and sand.
A constant, steady rain began falling Sunday evening, just in time for some perfect sleeping conditions....and our trip home the next day. Thanks for the wonderful time and wonderful dinners K&D!
© Free Blogger Templates Photoblog III by Ourblogtemplates.com 2008
Back to TOP